
Most explanations of this method give you five steps. Drill, inject, lift, patch, done.
That is the choreography, and it hides the job. The material is only liquid for about four seconds, and everything that decides how your slab comes up is settled before those seconds start.
What the material actually is
It arrives as two separate components and they never meet until the moment of injection.
The gun mixes them at the tip. Published specifications for this work require the two sides to be monitored separately and the ratio held between 0.95 and 1.05, which tells you how much the mix matters. Get the ratio wrong and you are not injecting the product you bought.
Once it reacts, the result is a closed cell solid, 87.3% closed cell on one grade and 91.3% on another. Closed cell matters underground, because the material is not going to sit there absorbing groundwater.
It is also why I keep the components separated and handled properly rather than treating them like caulk. Isocyanates are, in OSHA's words, the leading attributable cause of work-related asthma, with an exposure limit set at 0.02 ppm. That is a working reality of this method, not a scare story.
The number the whole method rests on
Everything else follows from one figure. Unconfined expansion of 12 to 15 times.
A small volume of liquid becomes a solid roughly a dozen times larger in the space under your concrete. The slab does not go up because I am forcing it. It goes up because something underneath it got bigger.
The cured material runs 4.75 to 6 pounds per cubic foot with a free rise compressive strength of 110 to 135 psi. Worth putting that against the public standard. A state transportation specification for this work sets its floor at 60 psi and 3.8 to 4.2 pounds per cubic foot. The material commonly sold for slab work clears that floor by about double.
Two lightweight facts with one heavy consequence. The stuff going under your patio weighs a fraction of what concrete weighs, and it still carries the slab.
The clock you are working against
Here is the part that changes how you should picture this job.
Cream time, the moment the mixture starts to react, is four seconds. Tack free at 25 seconds. Full rise complete at 27 to 32 seconds depending on the grade. Those are laboratory figures at a set temperature and shift a little in the field, but the scale is the point.
Read that again against what a lift involves. The window in which the material is doing anything you could influence is shorter than the time it takes to read this paragraph.
So the decisions are made beforehand. Where the ports go. How much goes in each one. Which order they run in. I cannot adjust a shot once it has started, and I cannot take it back afterward. That is the real difference between this and slurry, and it is not about mess or hole size. Slurry can be bled back off a slab. A cured thermoset cannot.
If you are weighing the two methods against each other rather than asking how one works, that sort is a separate page.
What happens on your slab, in order
The holes are small. A 5/8 inch hole drilled through the slab and into the soil below is the standard, and the Oregon study that measured this work used 16 mm, which is the same 0.63 inch. A public specification allows anywhere from 5/8 inch up to 2 inch depending on the work.
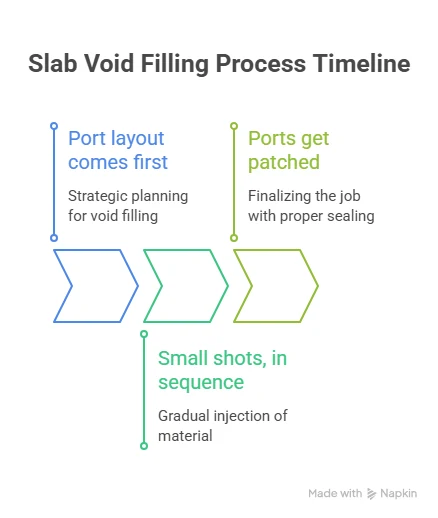
Port layout comes first, and it is not guesswork. Where the void is, where the slab is low, and where the material must not go. For general void filling under pavement, Oregon drilled on roughly a 4 foot grid across the whole work area.
Then small shots, in sequence, starting on the low side. Watch, wait, take the next one. The slab tells you what it is doing through the joint before it tells you through the face, which is why I stand where I can see a joint rather than admiring the middle of the slab.
Last, the ports get patched, and properly. Oregon went back after two years and found unsealed holes raveling under traffic. It is the last small step of a good job, and the one people skimp.
How the lift gets measured
I do not judge this by eye.
A taut string line or a laser level runs across the work while the lifting happens. The Texas specification requires the crew to continuously monitor pavement movement with equipment capable of reading to within one millimeter.
The slurry side of the trade has the same discipline in different words. Missouri's maintenance guidance says raise no more than a quarter inch at each hole at a time, working back and forth either side of the starting hole, with a straightedge at each joint. Raise the middle too fast and you put a sharp bend in the slab, and the guidance says plainly it would probably crack.
Different material, same rule. The industry's own stabilization guidelines tell crews to stop pumping the moment the slab begins to rise. Everybody who has written this down has written down the same thing: small increments, measured, stop early.
Where it goes wrong
This is the part I have never seen on a competitor's page, and it is the failure mode that actually matters.
Foam goes where it is easiest to go. Oregon's testing found it completely penetrating openings as small as a quarter inch, and some as small as an eighth of an inch, travelling well away from the hole it went in through.
That property is useful when you want a void filled thoroughly. It is a problem when the easiest path out is not under your slab. An open expansion joint, a washed out edge at an apron, a gap where the concrete meets the garage, a broken panel with daylight under it. The material finds those, and you get a slab that has not moved and a mess at the joint.
So joints get inspected and sealed before anybody injects anything, and an edge that has lost its soil changes the plan. If you are wondering whether to attempt any of this yourself, I went through that question honestly.
What the method cannot do
Raising a slab restores its position. It does not restore concrete that is worn out.
Foam does not repair a flaking surface, and it does not reassemble a panel that has broken into pieces, and it will not stop a growing root that will move the slab again on its own schedule. I turn down work on all three, because a level slab with a failed surface is still a failed surface.
Whether it holds
Traffic ready in 15 minutes tells you nothing about year five.
A lift lasts as long as the conditions under the slab allow. Get downspout discharge at least 5 feet from the foundation, or an underground catchment at least 10 feet out with lateral pipe pitched 5/8 inch per foot or steeper. Reseal joints. Keep grade falling away. I point that out at every estimate.
The agencies that do this at scale are honest about it. Missouri treats slab stabilization as a maintenance treatment with a service life rather than a repair that ends. How long a lift actually lasts is its own question, with numbers behind it.
Getting a look at yours
The pool deck I remember best was settling toward the water. Soft subgrade near the shell, so slurry was off the table before I finished walking it. Small holes, small shots, and I spent the whole lift watching the joint at the coping rather than the deck. It cured the same afternoon and it drains away from the pool now.
That is the job. Not the drilling, not the gun. Choosing the ports, sizing the shots, and watching the right line.
Free on site estimate, no obligation, and same day response is typical. Call or text (402) 625-4920. We cover Omaha, Bellevue, Papillion, La Vista, Ralston, Council Bluffs, Gretna and Bennington for foam lifting.
FAQ
How long does polyurethane foam take to cure?
The reaction is essentially over in under a minute. Published data sheets put cream time at four to five seconds and full rise at 27 to 32 seconds at test temperature. The practical number most people want is return to service, which is about 15 minutes for 90% of full strength. One state specification allows up to 30 minutes before opening to construction traffic, which is a conservative ceiling rather than a longer wait.
How big are the holes for foam concrete lifting?
The standard is a 5/8 inch hole drilled through the slab into the soil underneath. A state specification for this work permits 5/8 inch up to 2 inch depending on the application, and a transportation study that measured the process used 16 mm holes, which is 0.63 inch. They get patched at the end, and patching them properly matters more than people expect.
How does foam lift a slab without cracking it?
By going up in small increments and stopping early. Lifting is monitored against a taut string line or laser level, and one specification requires continuous monitoring to within one millimeter. The cementitious side of the trade follows the same principle with a written limit of a quarter inch per hole per pass. Cracking happens when a slab is raised unevenly or too fast in one place, which is a sequencing mistake rather than a material one.
How strong is the foam once it cures?
Published technical data sheets for two common grades give free rise compressive strength of 110 and 135 psi, at cured densities of 4.75 and 6 pounds per cubic foot. For comparison, a state purchase specification for polyurethane injection sets a minimum of 60 psi. The material is a small fraction of concrete's weight and still carries the slab above it.
Can foam lifting fail?
Yes, and the most common way is the material leaving before it lifts. Testing has found this foam penetrating gaps as small as an eighth of an inch, so an open joint, a broken edge or a gap at an apron gives it somewhere easier to go than under your concrete. It also fails when the slab was never a lifting candidate, or when the water that caused the settlement is still running.